Building Scale Model Production Guidelines | Professional Standards
Architectural models serve as crucial tools for design, presentation, and education, effectively conveying spatial relationships, scale, and intricate details. This guide outlines professional standards for producing high-quality scale models, covering essential types, material selection, tools, production steps, and advanced techniques.
1. Basic Types of Architectural Models
Architectural models are categorized based on their purpose and level of detail:
- Conceptual Model: Focuses on rapid visualization of design ideas. Typically constructed with basic materials, prioritizing overall form over intricate details. Not usually a detailed scale model.
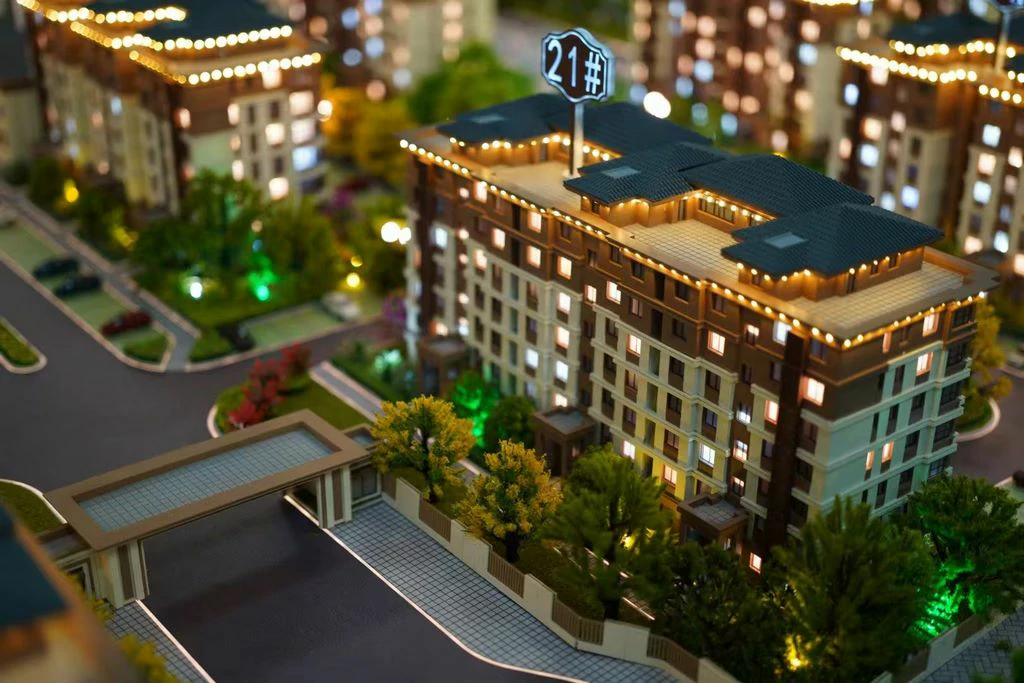
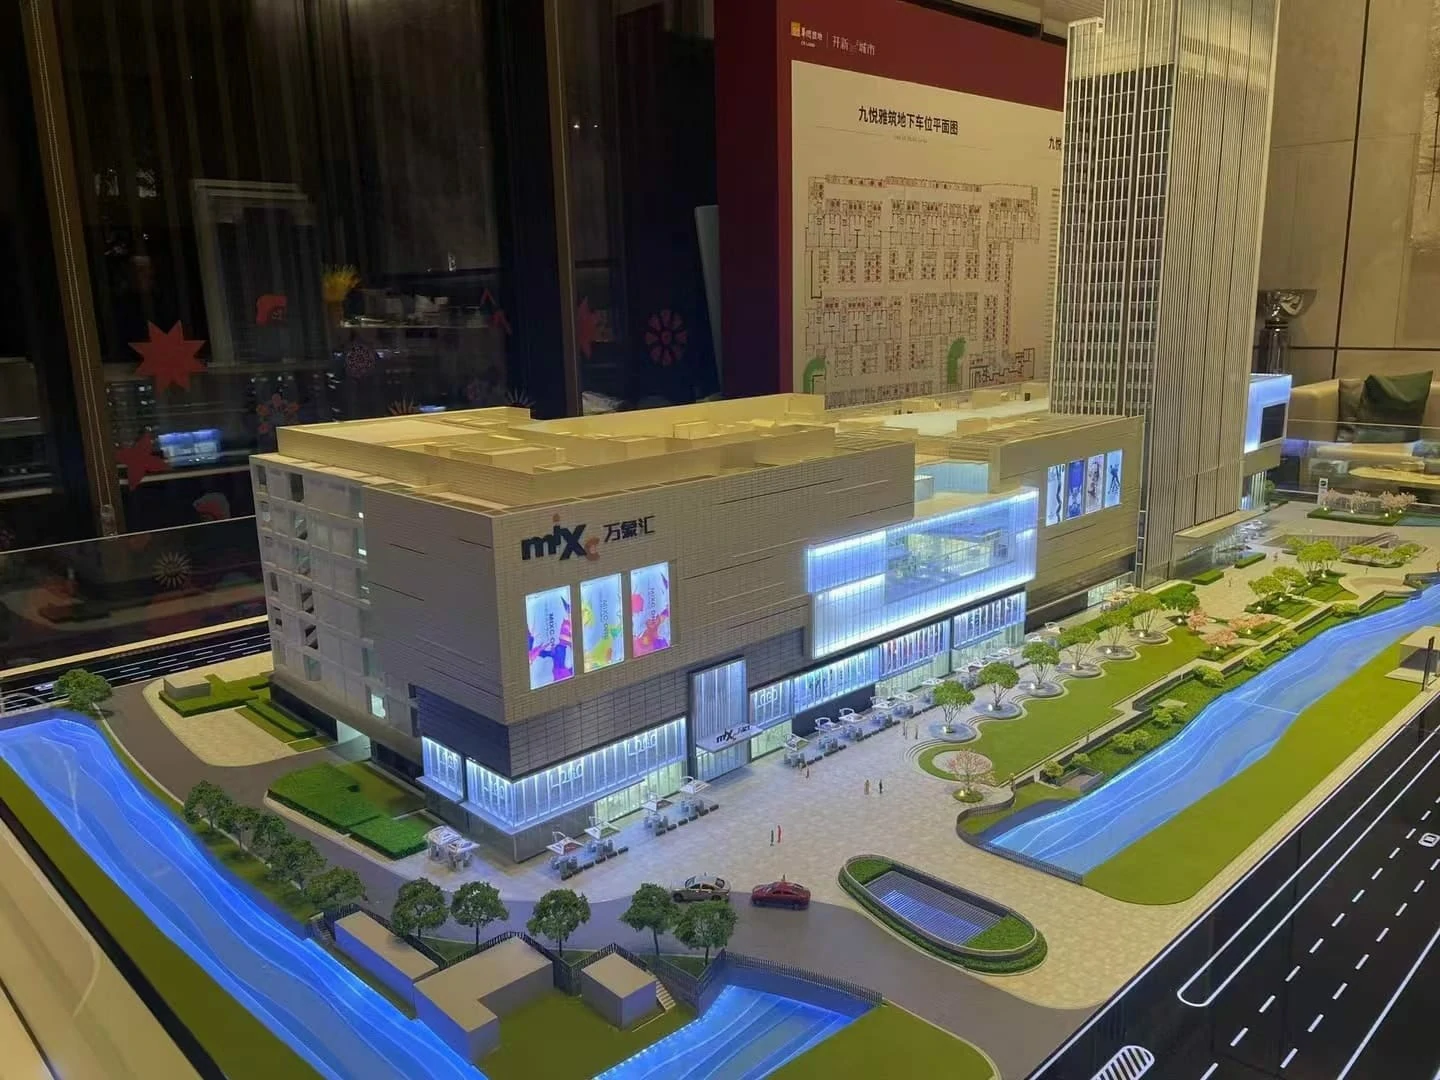
- Display Model (Presentation Model): Created to showcase the final design concept to clients or the public. Emphasis is placed on high craftsmanship, aesthetic appeal, and often includes non-scale elements for visual impact. Can incorporate scale model principles.
- Structural Model: Used primarily for studying structural systems, construction details, and assembly methods. Requires clear representation of internal structure, making it essential for engineering analysis.
- Proportional Model (Scale Model): A meticulously scaled-down representation of the actual building or site. Used for detailed analysis, research, and demonstrating precise spatial relationships. Scale model is a common term for proportional models.
2. Material Selection
Choosing the right materials significantly impacts the model’s quality, durability, and production cost:
- Foam Board: Excellent for creating model bases, terrain features (sand table model elements), and conceptual model components. Advantages include ease of cutting, light weight, and low cost. Disadvantages are susceptibility to damage and lower strength.
- Cardboard: Suitable for display models, especially simpler forms, and structural mock-ups. Readily available, printable, and generally eco-friendly. Prone to moisture damage and deformation.
- Wood Board: Ideal for structural models requiring strength and detail. Offers good texture and durability. Can be challenging to machine or shape precisely.
- Acrylic: Perfect for achieving high levels of detail, especially for glass elements or smooth facades in display and proportional models. Provides excellent translucency and a modern aesthetic. Can be costly and requires specialized cutting tools.
- 3D Printing Materials (e.g., PLA, ABS): Used for creating highly complex geometries, fine details, and functional components (3D printing model) for architectural details. Offers high precision but requires specific equipment and material handling.
3. Production Tools
Essential tools range from basic hand tools to sophisticated machinery:
- Basic Hand Tools:
- Cutting: X-acto knives, box cutters, wire strippers/saws.
- Measuring & Drawing: Rulers, tape measures, compasses, protractors.
- Adhesion: Hot glue guns, white glue, masking tape, U-tape, double-sided tape.
- Finishing: Tweezers, pliers, nail files, sandpaper.
- Professional Machinery (for higher precision and efficiency):
- Laser Cutting Machine
- 3D Printer
- CNC Engraving/Router Machine
4. Production Steps
A systematic approach ensures consistent results:
- Preliminary Preparation:
- Determine the appropriate scale (common scales: 1:50, 1:100, 1:200).
- Gather and interpret design drawings (CAD files, sketches).
- Break down the design into individual components and create templates.
- Base/Substrate Fabrication:
- Construct the model platform or base plate (using foam board, wood, etc.).
- Create terrain features (sand table model elements if applicable) using carving or layering.
- Add base details like roads, landscaping, or site furniture.
- Building Body Production:
- Carefully cut out each component according to the templates.
- Assemble the main structural elements of the building.
- Add facade details (windows, doors, decorative elements, signage).
- Surface Treatment & Detailing:
- Smooth and clean all seams.
- Apply paint finishes (spray, watercolor, markers) ensuring color accuracy.
- Add material textures (e.g., brick patterns, wood grain, stone textures).
- Site/Environmental Integration:
- Populate the model with representative environmental elements (figures, vehicles, landscape details).
- Consider adding lighting effects (e.g., miniature lamps, LED strips).
- Final Inspection & Decoration:
- Conduct a thorough quality check for accuracy, craftsmanship, and consistency.
- Add final touches or protective coatings if necessary.
5. Precautions for Quality Control
Attention to detail and safety is paramount:
- Proportional Consistency: Maintain strict adherence to the chosen scale throughout the model. Minor dimensional inconsistencies detract significantly from accuracy.
- Detail Appropriateness: Balance detail level with the model’s purpose. Overly detailed elements may not be necessary, while under-detailed models may fail to communicate the design effectively. Scale model production requires careful detail control.
- Safe Operations: Use appropriate safety gear (eye protection) when operating cutting tools. Employ cutting pads or cutting boards to minimize injury risk.
- Workspace Management: Keep the work area organized and free from clutter to prevent losing small parts and maintain workflow efficiency.
- Model Preservation: Protect the finished model from environmental damage (dust, extreme temperatures, humidity, direct sunlight) to preserve its integrity.
6. Advanced Techniques for Enhanced Models
Elevate the model beyond basic construction:
- Component Integration: Assemble components from different floors or sections before integrating them into the final model.
- Material Hybridization: Combine different materials effectively. For instance, use wood for structural elements and acrylic for transparent parts like glazing (3D printing model can also be used for specific hybrid parts).
- Digital Assistance: Leverage CAD software for precise design, template generation, and even digital fabrication (3D printing model, CNC routing).
- Lighting Effects: Integrate subtle or dramatic lighting to highlight features, create mood, or simulate natural light (e.g., fiber optic lighting, miniature spotlights).
- Kinetic Elements: Incorporate movable parts like doors, windows, or sections to demonstrate functionality and increase user interaction.